oil by-pass mod. completed

Elim8u

Well-Known Member
Joined
Jan 3, 2008
Messages
108
Reaction score
0
Location
Lincoln Nebr
Hey a few shots of some work I've been doing on
the ZL900
 

Attachments

  • zl bypass  shift star 009.jpg
    zl bypass shift star 009.jpg
    65.8 KB · Views: 511
  • zl bypass  shift star 010.jpg
    zl bypass shift star 010.jpg
    65.5 KB · Views: 385
  • zl bypass  shift star 011.jpg
    zl bypass shift star 011.jpg
    74.6 KB · Views: 405
  • zl bypass  shift star 012.jpg
    zl bypass shift star 012.jpg
    78.6 KB · Views: 369
  • zl bypass  shift star 013.jpg
    zl bypass shift star 013.jpg
    62.4 KB · Views: 355
All most for got , #4 main bearing mod . Realign oiling port in bearing
cap. Photo 004 an 005 are before,007/oo8 are after work.
 

Attachments

  • zl bypass  shift star 005.jpg
    zl bypass shift star 005.jpg
    41.7 KB · Views: 256
  • zl bypass  shift star 007.jpg
    zl bypass shift star 007.jpg
    38.5 KB · Views: 336
  • zl bypass  shift star 004.jpg
    zl bypass shift star 004.jpg
    38.6 KB · Views: 228
  • zl bypass  shift star 008.jpg
    zl bypass shift star 008.jpg
    42 KB · Views: 333
Nice work! :)

Must be good to know you have a real good chance of no issues with bearings etc.
I know lots of people have had no issues - but precautions dont hurt!
 
Very nice work. Since I currently am one of the fortunate (?) few with a rod through the front of the crankcase on my '85 ZL900; I'll be doing this on the replacement motor.

GD
 
WOW....I have heard of this "poor oiling" thing for a couple of years now but had NO IDEA Mamma Kaw let it out of the factory like that. Looks like a Ford part! Is it just the one, and the others don't look that way? I bet that'll make a difference now.
 
Congrat on your setup.

I have some questions though that i would like to be answered. I am not mechanic, but i like to work myself on my zl900 doing simple stuff like valve clearance, carb balancing/cleaning etc... So in short, i was reading this board and was surprised to see that there is some modifications to be made to increase the oil pressure at some internal components (rod bearring).
The way i seems to understand here is that the oil line comming from the oil filter is routed via one line in front and then, divided in two. one line is feeding Rod 1 and rod 2. The other oil line is feeding rod 3 and 4 and also the upper part of the engine.

My thinking here : (probably wrong, but just for the fun of exchanging knowledge)
Since all the oil is comming from the same source (filter), how can it affect the pressure by dividing the line in 2 or even 3 ?
If you take your garden hose as an example, you plug the end of it and then, you connect a pressure gauge, you would have a certain pressure. Now if you plug a "Y" on that garden hose (to split it in two ) and you plug the end of both, then you take the pressure reading.... Wouldnt the pressure be the same as before ? Now instead of 2 hoses, you put 5, all pluged at the end.... would the pressure change ?
Now from one of the 5 hoses, if you let some water escape (small hole), wouldnt the pressure decrease all across the lines by the same amount ?

Now if i ask this question :
If one oil line were to feed rod 1 and 2, and an other oil line to feed rod 3 and 4, and a third oil line to feed the upper part of the engine and tranny etc... would that be better ?

I can understand that the more parts that are lubricated via an oil line the less pressure you will get, but the decrease of pressure will be all across the engine.

Probably wrong on this one, but i would like know what are you guys thinking about this.

have a nice day all.

Here is a picture of my ride :
http://img130.imageshack.us/my.php?image=kawa50qt.jpg
 
Last edited:
It may not be a pressure problem but a flow problem? I am not really sure as I am not up on this..

Willy
 
hey elim8u...With a mill set-up like that, could you mill a fork brace out of a piece of aluminum??

Willy
 
Yes, don't confuse flow with pressure. Fluid pressure is only the resistance to flow, nothing more. There are a number of other factors that affect flow, but it's late and getting past my bedtime.
 
Isnt it easier to install the external one... I have seen pictures like yours, and also they were showing the external one. The exhaust might be a problem to the external line though...
 
if I'm ever "in" the motor i will be doing what you did
 
I have never removed the oil pan from my bike, so i dont know what is involved. In your picture it shows that you have grinded the plate to make a way for the by-pass tube.
I assume that both tubes are there from factory ? the only thing you have to add the bypass tube right ?

thanks.
 
Yes, I added the bypass , but in hind sight I think I would separate the two lines.
Just run from the I-tube to no.3-4 ext. and block off the Y,
and use 3/8 steel tube instead of 5/16.
This mod is to increase oil flow. So you may also want to redrill the 4 rod cap oil hole,
not the bearing.
Internal or external bypass just a personal choice
Internal may be better if you have a D/D 4 into 1 exhaust for clearance.
Yes I could make a fork brace. But manual machines are slow and time = money!
So if we can find some one with a CNC mill much faster = less money
And they can cut designs and letters.
Thats why I'm signed up for a brace also. But may try making one this winter.
 
Yes, I added the bypass , but in hind sight I think I would separate the two lines.
Just run from the I-tube to no.3-4 ext. and block off the Y,
and use 3/8 steel tube instead of 5/16.
This mod is to increase oil flow. So you may also want to redrill the 4 rod cap oil hole, not the bearing.


bump bump

I'm looking into some of this stuff since my 1000 is apart. I've been reading on all the other sites and links about this and trying to get it through my thick skull. There doesn't seem to be much in the way of measurements and specs on how to do some of this stuff. In other words I'm an idiot and need a "how-to" for some of these oil mods - hahaha. Elim8u - Not quite sure I understand how you would go about seperating the 2 lines. Are you saying just leave the j-tube alone and instead graft onto the I tube? Then how would that get graft get routed to #3 and #4? Later.
 
Did they fix this problem in the later Connie motors, say the 1995- 2006? Or is this just something people have to deal with? I was thinking that if someone had a later year Connie motor they might have noticed something different inside the cases or oil pan...
 
From all the reading I've done, it seems that these so called problems extend through most all years of ZX-11's. Some people wind up having a problem others don't. So it's very hit or miss it seems. So I don't know about the connie motors - I'm with the better safe than sorry crew and am trying to look into doing some of these mods just for longevity of the motor. Later.
 
<table id="lightbox5" style="position: absolute; left: 283px; top: 799px; z-index: 11; display: none;" border="0" cellpadding="0" cellspacing="0"> <tbody><tr> <td>
<input class="button" value="X" id="lightboxbutton5" style="padding: 4px; background-color: black; color: white; width: 30px; border: 1px solid white; position: relative; top: 12px; left: -12px; font-weight: bold; cursor: pointer;" type="button">​
<table style="border: 1px solid white; background-color: black;" width="100%" border="0" cellpadding="0" cellspacing="0"> <tbody><tr valign="middle"> <td colspan="2" style="text-align: center;" id="lightboxholder" valign="middle" align="center"> </td> </tr> <tr class="lightboxtextrow"> <td class="smallfont" style="padding: 4px; background-color: black; color: white;">zl bypass shift star 005.jpg (1 of 4)</td> <td class="smallfont" style="padding: 4px; background-color: black; color: white; text-align: right;">05-24-2008 12:40 AM</td> </tr> <tr> <td style="background-color: black; color: white;" colspan="2" align="center"> <input class="button" value="Last" id="lightboxprevbutton5" style="padding: 4px; background-color: black; color: white; border: 1px solid white; position: relative; top: 12px; font-weight: bold; cursor: pointer;" type="button"> <input class="button" value="Next" id="lightboxnextbutton5" style="padding: 4px; background-color: black; color: white; border: 1px solid white; position: relative; top: 12px; font-weight: bold; cursor: pointer;" type="button"> </td> </tr> </tbody></table> </td> </tr> </tbody></table><table id="lightbox6" style="position: absolute; left: 203px; top: 715px; z-index: 11; display: none;" border="0" cellpadding="0" cellspacing="0"> <tbody><tr> <td>
<input class="button" value="X" id="lightboxbutton6" style="padding: 4px; background-color: black; color: white; width: 30px; border: 1px solid white; position: relative; top: 12px; left: -12px; font-weight: bold; cursor: pointer;" type="button">​
<table style="border: 1px solid white; background-color: black;" width="100%" border="0" cellpadding="0" cellspacing="0"> <tbody><tr valign="middle"> <td colspan="2" style="text-align: center;" id="lightboxholder" valign="middle" align="center"> </td> </tr> <tr class="lightboxtextrow"> <td class="smallfont" style="padding: 4px; background-color: black; color: white;">zl bypass shift star 007.jpg (2 of 4)</td> <td class="smallfont" style="padding: 4px; background-color: black; color: white; text-align: right;">05-24-2008 12:42 AM</td> </tr> <tr> <td style="background-color: black; color: white;" colspan="2" align="center"> <input class="button" value="Previous" id="lightboxprevbutton6" style="padding: 4px; background-color: black; color: white; border: 1px solid white; position: relative; top: 12px; font-weight: bold; cursor: pointer;" type="button"> <input class="button" value="Next" id="lightboxnextbutton6" style="padding: 4px; background-color: black; color: white; border: 1px solid white; position: relative; top: 12px; font-weight: bold; cursor: pointer;" type="button"> </td> </tr> </tbody></table> </td> </tr> </tbody></table><table id="lightbox7" style="position: absolute; left: 283px; top: 799px; z-index: 11; display: none;" border="0" cellpadding="0" cellspacing="0"> <tbody><tr> <td>
<input class="button" value="X" id="lightboxbutton7" style="padding: 4px; background-color: black; color: white; width: 30px; border: 1px solid white; position: relative; top: 12px; left: -12px; font-weight: bold; cursor: pointer;" type="button">​
<table style="border: 1px solid white; background-color: black;" width="100%" border="0" cellpadding="0" cellspacing="0"> <tbody><tr valign="middle"> <td colspan="2" style="text-align: center;" id="lightboxholder" valign="middle" align="center"> </td> </tr> <tr class="lightboxtextrow"> <td class="smallfont" style="padding: 4px; background-color: black; color: white;">zl bypass shift star 004.jpg (3 of 4)</td> <td class="smallfont" style="padding: 4px; background-color: black; color: white; text-align: right;">05-24-2008 12:47 AM</td> </tr> <tr> <td style="background-color: black; color: white;" colspan="2" align="center"> <input class="button" value="Previous" id="lightboxprevbutton7" style="padding: 4px; background-color: black; color: white; border: 1px solid white; position: relative; top: 12px; font-weight: bold; cursor: pointer;" type="button"> <input class="button" value="Next" id="lightboxnextbutton7" style="padding: 4px; background-color: black; color: white; border: 1px solid white; position: relative; top: 12px; font-weight: bold; cursor: pointer;" type="button"> </td> </tr> </tbody></table> </td> </tr> </tbody></table><table id="lightbox8" style="position: absolute; left: 203px; top: 715px; z-index: 11; display: none;" border="0" cellpadding="0" cellspacing="0"> <tbody><tr> <td>
<input class="button" value="X" id="lightboxbutton8" style="padding: 4px; background-color: black; color: white; width: 30px; border: 1px solid white; position: relative; top: 12px; left: -12px; font-weight: bold; cursor: pointer;" type="button">​
<table style="border: 1px solid white; background-color: black;" width="100%" border="0" cellpadding="0" cellspacing="0"> <tbody><tr valign="middle"> <td colspan="2" style="text-align: center;" id="lightboxholder" valign="middle" align="center"> </td> </tr> <tr class="lightboxtextrow"> <td class="smallfont" style="padding: 4px; background-color: black; color: white;">zl bypass shift star 008.jpg (4 of 4)</td> <td class="smallfont" style="padding: 4px; background-color: black; color: white; text-align: right;">05-24-2008 12:47 AM</td> </tr> <tr> <td style="background-color: black; color: white;" colspan="2" align="center"> <input class="button" value="Previous" id="lightboxprevbutton8" style="padding: 4px; background-color: black; color: white; border: 1px solid white; position: relative; top: 12px; font-weight: bold; cursor: pointer;" type="button"> <input class="button" value="First" id="lightboxnextbutton8" style="padding: 4px; background-color: black; color: white; border: 1px solid white; position: relative; top: 12px; font-weight: bold; cursor: pointer;" type="button"> </td> </tr> </tbody></table> </td> </tr> </tbody></table>
<input class="button" value="X" id="lightboxbutton0" style="padding: 4px; background-color: black; color: white; width: 30px; border: 1px solid white; position: relative; top: 12px; left: -12px; font-weight: bold; cursor: pointer;" type="button">​


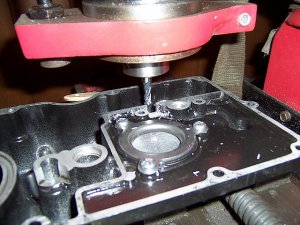
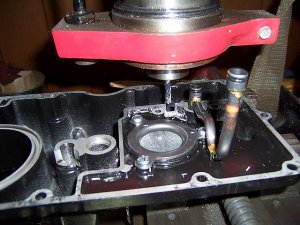
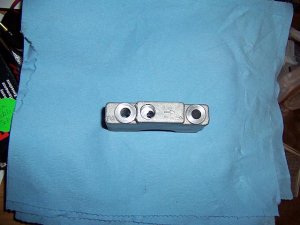
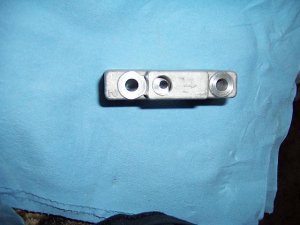
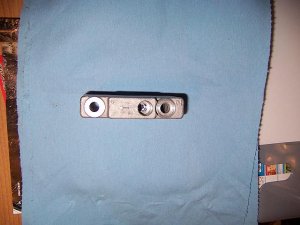
What exactly are you milling here and why? I can see the tube changes and why to do them but can't grab what's being done here.
 
So what, is there NO answer to the question of what is being DRILLED? I am about to put mine back together and it would help LOADS if I had a better answer. Please help as if I don't get an answer it's going back the same way.
 
SD, nothing is being drilled, that's a milling machine to open up the lip between the sections of the pan for running the new tube used to supply a higher volume of oil.
 
Back
Top