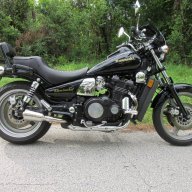
Series of issues with ZL 400

:hello: That's good that you don't have any of the smog junk. So just put vacuum nipples on carbs 1,3 & 4 and the petcocks vacuum line on carb #2.

 
  • Like
Reactions: vas
Good morning everyone. Ok so today is the the day that the carbs are going back on the bike. I have three questions.

First and most important:​

The main jets (THOSE) of my carbs were size #90. HERE says that they should be #82. I've got some replacements with the kits but those were size #102, which is too big obviously. The air/fuel screw was set up at 2.5 turns out whereas manual says 2 turns out. Does a size #90 main jet work well with 2.5-turns-out screw? Are those two related at all? Should I go for a 2.25 turns out or even fewer instead? Also, keep in mind that I am at sea level.

Second:​

Is there a trick to putting the carbs back and connecting the carbs-to-airbox hoses easily? Is there a visual guide of how should they be turned to fit properly? I have put the short end up and the hose angles upwards. Last time, I cursed a lot and still didn't manage to install them correctly.

upload_2021-8-7_9-52-30.jpeg

Third:​

I have turned my idle screw so I can barely see the little hole in the butterfly. Should I turn it more? My goal is to start the bike and it being able to hold idle so I don't freak out that it's not working. I will obviously set up correctly when warm.

upload_2021-8-7_9-38-44.jpeg
​
As always, your experience and advice is invaluable. If I hadn't found you, I'm sure I would have burnt the bike and would have been depressed. Cheers
 
Last edited:
:hello: 2 1/2 turns out is fine for the air mixture screws. Watch some videos on bench syning carbs. First you need to remove the air box boots from the carbs. Then install the carbs. Slide them in down low just above the motor. Get them all the way into the intake boots and tighten all 4 hose clamps. Next put all 4 air box boots in starting with #4. Then work the boots over the carbs. Before you start have all 4 springs down around the boots. I use this to install the air box boots onto the carbs. https://www.amazon.com/Wilde-Tool-5...ocphy=9011757&hvtargid=pla-570251781511&psc=1 .
 
:hello: That's good that you don't have any of the smog junk. So just put vacuum nipples on carbs 1,3 & 4 and the petcocks vacuum line on carb #2.


Could I ask why I should plug them individually and not with each other? I realised that my other zl400 has #1 and #4 together and #2 and #3 together to the petcock.

I'm asking to learn and not questioning your advice!
 
:hello: Doing them individually is better because if you have a vacuum leak not all three unused ones will leak at the same time. Also when I put the air box boots on I roll them up and put masking tape around each boot before putting them into the air box. Leave the tape on untill you get the boots in place. I made one of my cotter pin removers longer using a section from an old screw driver. 20210807_091043[1].jpg
 
  • Like
Reactions: vas
I also used picks like RJ, but found my original boots were far too hard to get back on. Much easier with new ones.
 
I also used picks like RJ, but found my original boots were far too hard to get back on. Much easier with new ones.


I need to spend 100€ for a pack of 4 carb-to-airbox boots. I feel like it's too expensive but on the other hand, those damn boots almost eliminate the purpose of the airbox.
 
Here's an update. For the first few seconds, the vacuum hose of the petcock was not plugged. Probably played a role in starting.


I also think I'm going to try oem carb vacuum connections (1-4, 2-3-petcock)
 
I like tubing instead of caps. Maybe I'll try pinching them off to see if it makes a difference when decelerating or at idle.
 
So last issue I'm having. Everything else is MOSTLY okay. One of the screws of the tank (where the fuel petcock is) is leaking gas. I tried changing the screw and adding some sort of insulation but there is still minor leaking and the faint smell of gas around the area. The "mechanic" I entrusted the bike probably tightened the screw slightly sideways, and now it cannot become snug.

Any suggestions on how to mend this? Ideally, I would not want to buy another tank. Thanks!
 
They are machine screws and do not seal like pipe threads. You need a sealing washer under the head of the screw. Your best bet is a nylon washer. There are some fiber washers that work too but sometimes they don't.
 
  • Like
Reactions: vas
They are machine screws and do not seal like pipe threads. You need a sealing washer under the head of the screw. Your best bet is a nylon washer. There are some fiber washers that work too but sometimes they don't.

I have some extra from the carb rebuild kits that fit the screws nicely without any play. Should I go with those or look for other ones?

The weird think is that it only leaks from the screw that cannot be tightened too much. the other one is leak-free. I will give it a shot. Thanks
 
Maybe you can remove the crooked screw and get it in straight with a little force and some lube on the threads. It sounds like the threads can be saved.
 
:hello: As long as the nylon washers fit use what you have. Run a tap in it to strighten out the threads. Use a new screw. If it still leaks put some plumbers tape on the threads of the bad one. If needed I find a STD US thread bolt/screw slightly bigger than the metric ones. For example if the screw is 5 mm tap to a 1/4 20.
 
Maybe you can remove the crooked screw and get it in straight with a little force and some lube on the threads. It sounds like the threads can be saved.
It's not the screw that's crooked. I put a new one and it's the same weird fit. If i turn it too much, it kicks.
 
Ill
:hello: As long as the nylon washers fit use what you have. Run a tap in it to strighten out the threads. Use a new screw. If it still leaks put some plumbers tape on the threads of the bad one. If needed I find a STD US thread bolt/screw slightly bigger than the metric ones. For example if the screw is 5 mm tap to a 1/4 20.
I'll upload some pictures tomorrow if I find the time. Thanks
 
Hi again. Hopefully for the last time. I'm joking of course.

The fuel petcock spits gas from the little hole on the side. I have two petcocks and they are totally similar. Same hole. Why is it spitting gas and leaking as well from there?

Keep in mind that I rebuilt the petcock, the diaphragms inside are new. What could be the problem?

Thanks

Could it be due to the stupidest of reasons: the screws not tight enough?
 

Attachments

  • 20210814_132124.jpg
    20210814_132124.jpg
    82.3 KB · Views: 3
:hello: Did you replace the 4 mm O-ring that goes on the one end of the diaphram.

O ring at the diaphragm? You mean at the tip? Yeah it was attached.

I think it was the screws not sealing properly. Thanks and apologies for the panick
 
Back
Top